Rapid prototyping with V0: A step-by-step guide
In today's world of software and product development, the ability to quickly prototype ideas is more important than ever. Traditional design-to-development processes can be time-consuming, which might lead to delays and bottlenecks in projects. Enter V0 by Verce is a game-changing tool that is revolutionizing how we approach prototyping. It allows developers to build React components in seconds and full UI prototypes in minutes.
So, if you’re looking for an easy way to create functional UI components without spending hours writing code, this guide is for you. We’ll walk through the entire process, from setting up V0 to integrating the generated components into your project. Let's dive right in!
Why VO is a game-changer
V0 is designed for everyone - whether you’re a developer, designer, product manager, entrepreneur, or even someone just getting started in tech. For developers, V0 is a dream come true. It removes the need to manually write code for each component, speeding up the prototyping process and reducing repetitive tasks. But the potential doesn’t stop there - designers, product managers, and entrepreneurs also have much to gain. V0 is ideal for creating proof-of-concept models, allowing you to visualize and test ideas before diving into full-scale development.
Key features and capabilities of V0
V0 leverages AI to streamline React component generation with Tailwind CSS and shadcn/ui, enabling rapid prototyping and design iteration. The generated code integrates seamlessly with Next.js and Radix UI, and V0 excels at creating modular components that are flexible, customizable, and easy to integrate into your project. With AI-driven tools, you can enhance static designs by incorporating real-time data, bridging the gap between static UI and interactive applications.
Impact on UI/UX design
V0 is revolutionizing UI/UX design by enabling faster prototyping and iteration. As AI-driven tools become more prevalent, designers and developers can focus more on creativity and functionality rather than repetitive coding tasks. This shift is making the design-to-development workflow more agile, efficient, and accessible to a broader audience.
Why use V0 for prototyping?
- Speed: Build prototypes in minutes, not hours.
- Efficiency: AI-generated code follows best practices.
- Customization: Easily tweak components to match your design.
- Seamless integration: Works smoothly with Next.js, Tailwind CSS, and Radix UI.
In this guide, we will walk through the process of setting up V0, generating components, and integrating them into your project, along with 8 methods to help you maximize V0’s potential for greater precision and control over the AI-generated results.
Step-by-step process of creating a UI prototype
Let’s dive deeper into each step of creating a UI prototype using V0:
Step 1: Develop your UI components
Getting started with V0 is simple. Here’s how to begin:
- Visit the V0 website: Head to v0.dev.
- Sign in: You can use your GitHub or Vercel account to log in.
- Describe your UI: Use natural language to describe the component you want.
- Generate the code: Whether it’s a login form or a card component, V0 can generate a fully functional React component based on your description.
Example prompt:
"A sleek login form with email, password fields, and a submit button."
V0 generates the React component with Tailwind CSS styled UI elements and Radix UI accessibility features.
Refining:
Once the component is generated, you can refine it to meet your exact needs. For more control over styling, adjust the Tailwind classes or tweak the props and event handlers. If you’re looking for reusable, aesthetically pleasing elements, shadcn/ui offers a great selection of UI components.
Step 2: Integrate V0 components into your project
Now that you have your generated components, it’s time to integrate them into your project. Here’s how you can get started:
1. Set up your Next.js project
If you don’t already have a Next.js project, set one up with a simple command:
2. Install dependencies
Install the required libraries to ensure smooth integration of your V0 components:
3. Add your V0 component
Copy the generated code from V0, create a new component file (e.g., LoginForm.tsx), and paste the code in. Now, import it into your Next.js page and use it like this:
Step 3: Enhance your prototype with AI agents
One of V0’s most exciting features is its ability to enhance prototypes with dynamic content via AI agents. You can fetch real-time data, integrating APIs and making your static components interactive.
For example, let’s integrate a Dad Jokes API into your V0 component using React’s useEffect and useState hooks:
This simple integration takes your static UI and brings it to life with real-time data.
8 ways to maximize V0’s potential
V0 isn’t just about generating a UI component and calling it a day. To make the most of V0’s capabilities, here are eight methods to enhance your prototypes and take your UI development to the next level:
1. Provide detailed requirements
A clear, detailed prompt is essential for getting accurate AI-generated components. For example, instead of just asking for a “login form,” you could specify the exact fields needed (like email and password), the layout (like vertical or horizontal alignment), and any specific design features (such as rounded corners or a shadow effect). If you need help refining your prompt, tools like ChatGPT can assist you by guiding you through the details, ensuring that you communicate your needs clearly to V0.
2. Revise a specific component
Once V0 generates your components, you may want to make adjustments to elements like text, layout, or styling. Instead of manually describing each revision, you can use the “select” feature to make the process easier.
Simply click the “select” icon to enter selection mode, then hover over the component you wish to change. Once it’s highlighted, click on it and use natural language to specify the adjustments you’d like to make. V0 will instantly regenerate the updated component based on your request.

3. Provide a reference (URL or snapshot)
If you want to replicate a design or webpage, V0 makes it simple. Just provide the URL, and V0 will take a snapshot to generate a matching component using shadcn/ui components and Tailwind CSS. You can also upload a static image of the design for reference. This feature is great for quickly cloning an existing design or using a live webpage as inspiration during prototyping.
If you wish to dive deeper into Vercel V0 and learn how to clone a website using a URL with AI, watch this quick video:
4. Share or deploy your app
Once your prototype is ready, sharing or deploying it is simple and efficient to ensure alignment. If you wish to share a preview with others for feedback - simply click on the “Share” icon, which is often enough for most purposes.
If you want to take it a step further and deploy the app live for actual use, V0’s integration with Vercel allows you to do so (click on ''Deploy''). This instant deployment not only helps you gather immediate feedback from users but also speeds up the process of turning your prototype into a fully functional app. Moreover, it removes the need for manual setups, streamlining your development workflow. The deployment can be easily disabled.

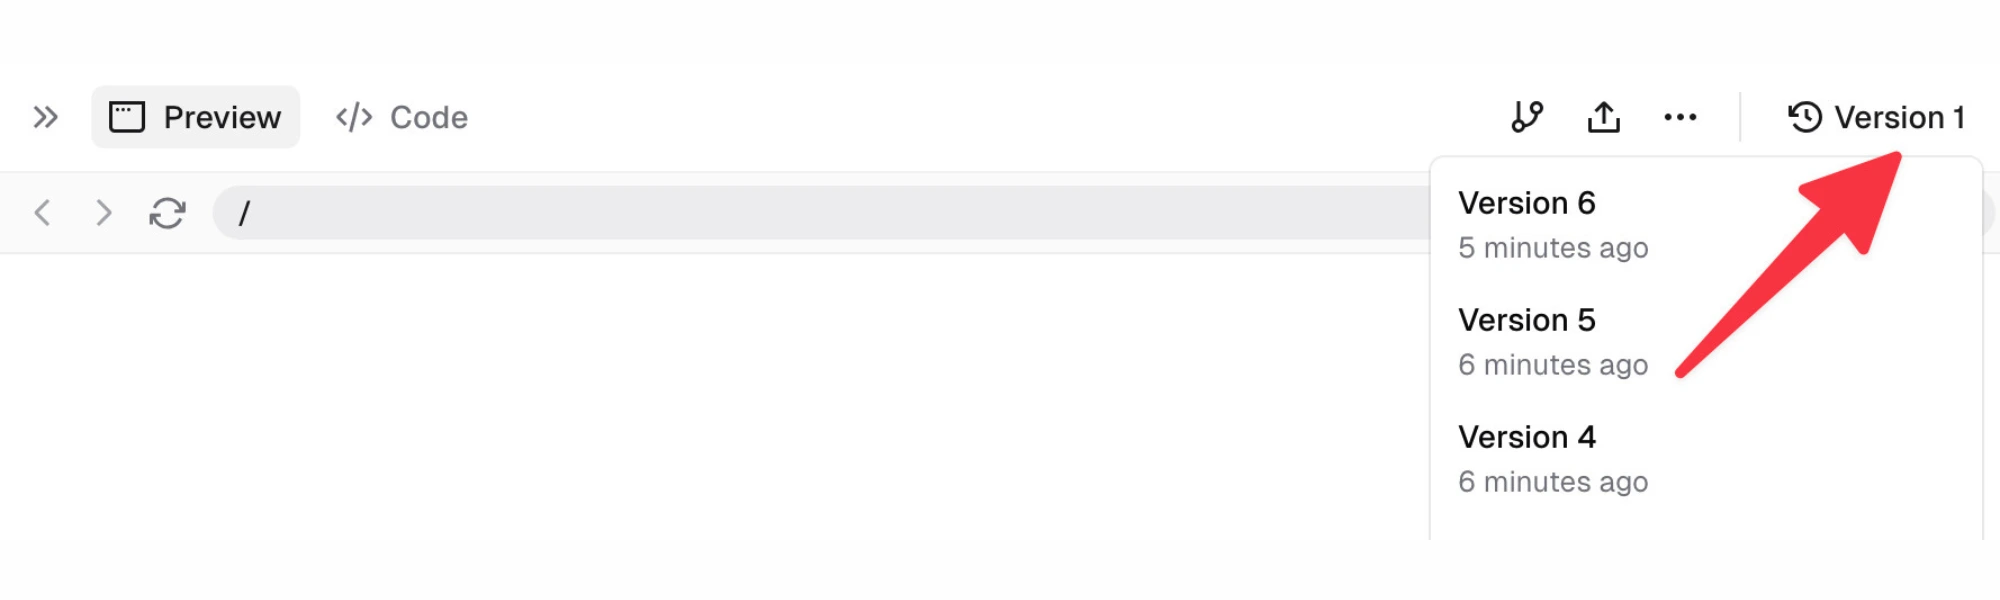
5. Use version control
Version control is key to maintaining consistency and managing iterative changes. With V0’s version control feature, you can track and manage different versions of your design. If you make changes and later want to revert to a previous version, V0 makes it easy to do so. This is especially helpful when refining your UI over time, as it ensures that you can always go back to a previous state, while also maintaining a clear record of your design evolution.
6. Incorporate shadcn/ui components
Components are the foundation of any user interface, and having the right ones can greatly enhance your development process. If you have a clear vision for your app and want full control over the outcome, starting with individual components is a great approach.
With V0’s use of shadcn/ui, you have access to a library of pre-built, fully customizable components that integrate seamlessly into your project. These flexible components save you time by letting you build a cohesive UI without designing every element from scratch. This is especially beneficial when working with Next.js, as the components are optimized for easy integration.
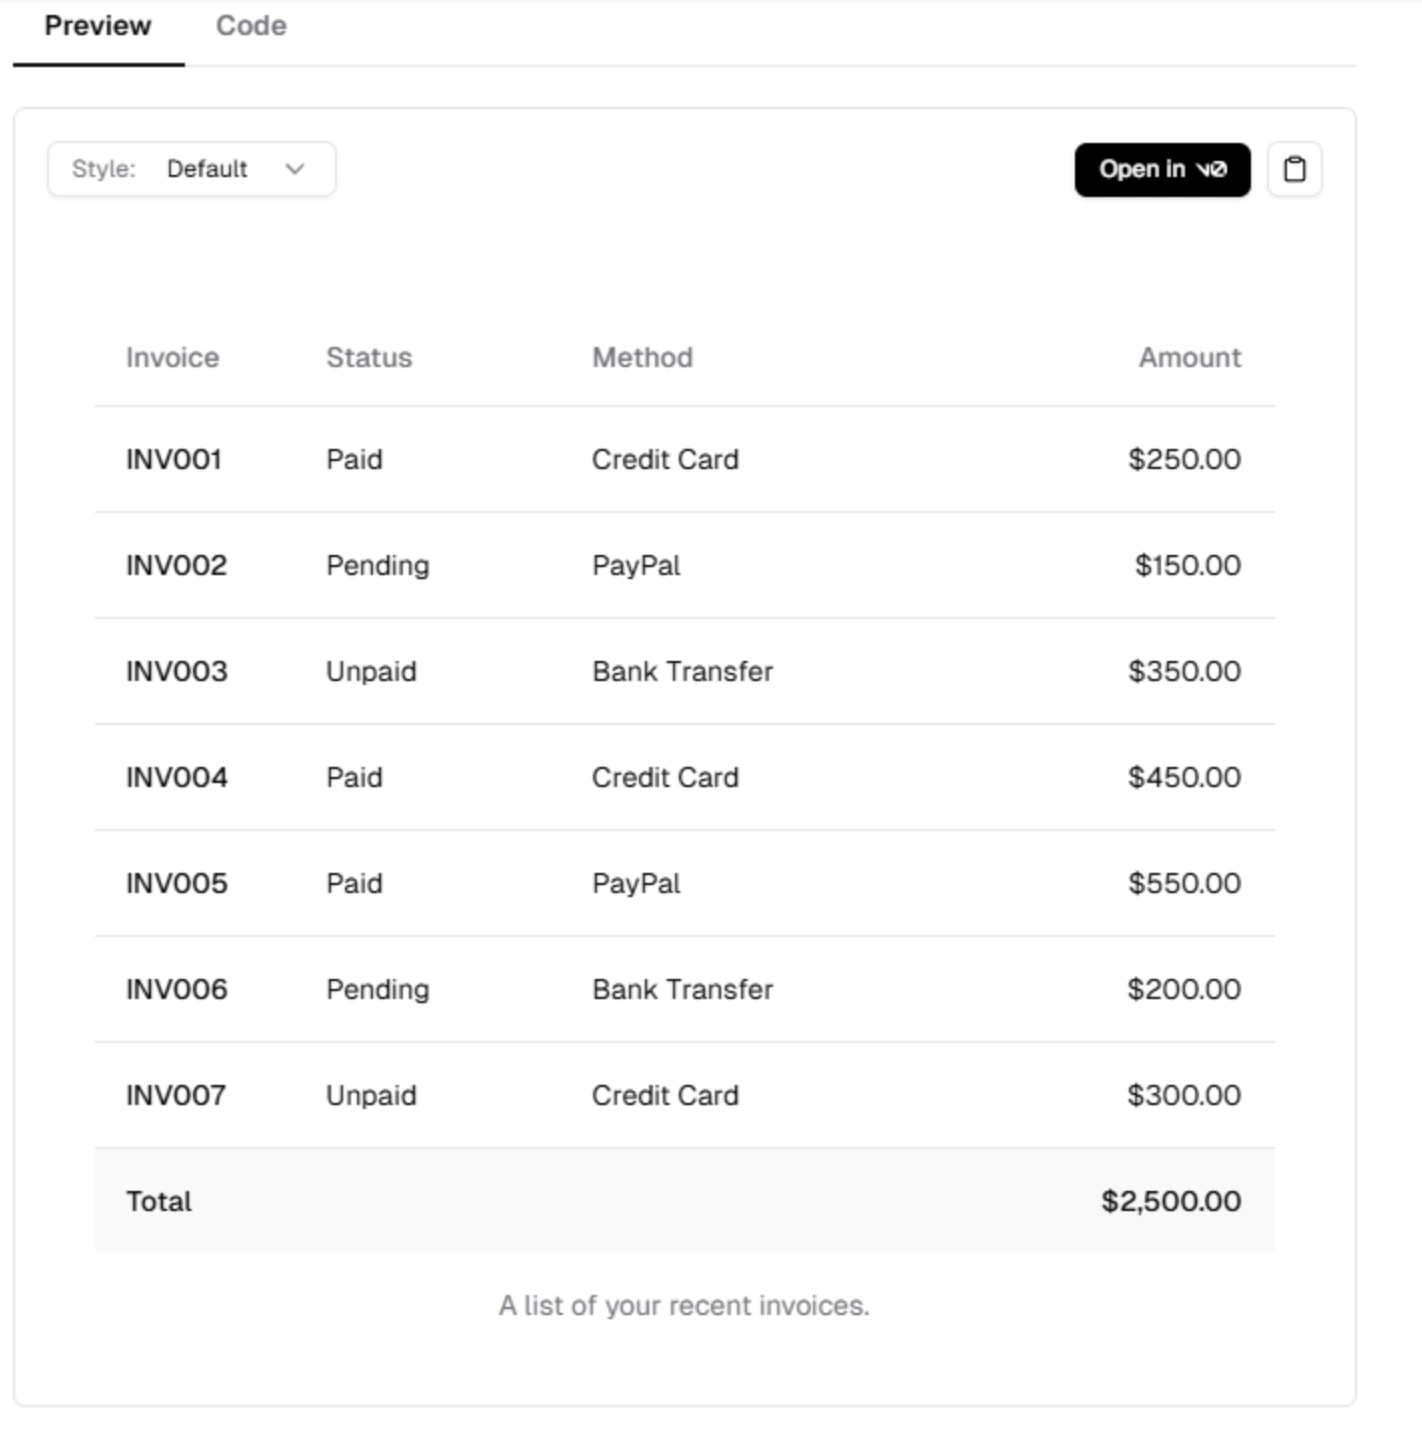
- Select your preferred components
You can select the components you want to use. Let's take a table demo as an example:
- Incorporate the element into your project
Once you’ve selected the components you want to use, you can visit the shadcn/ui website, find the element you need, and click “Open in V0” to incorporate it directly into your project.
- Customize the components
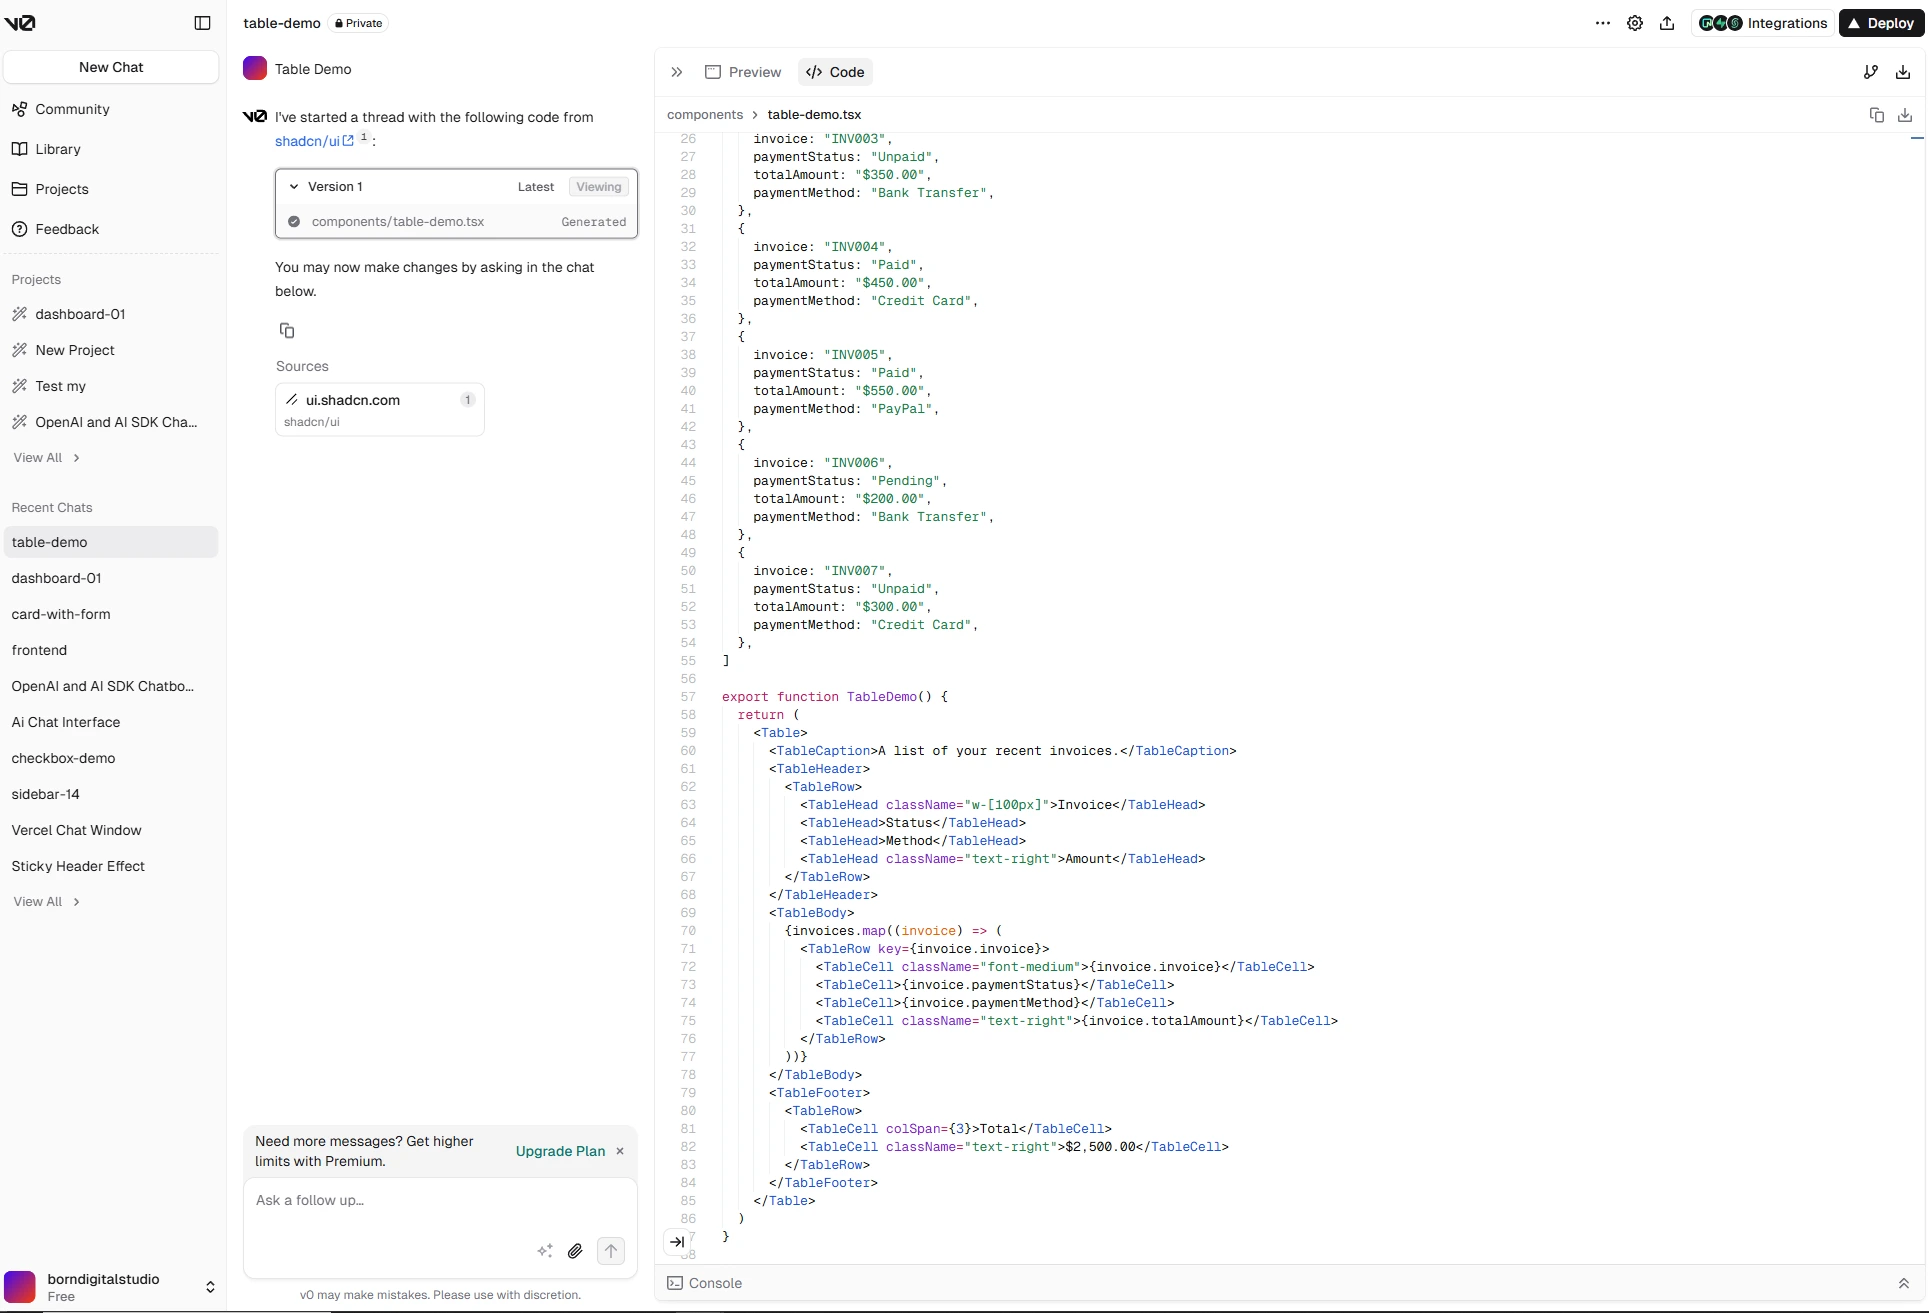
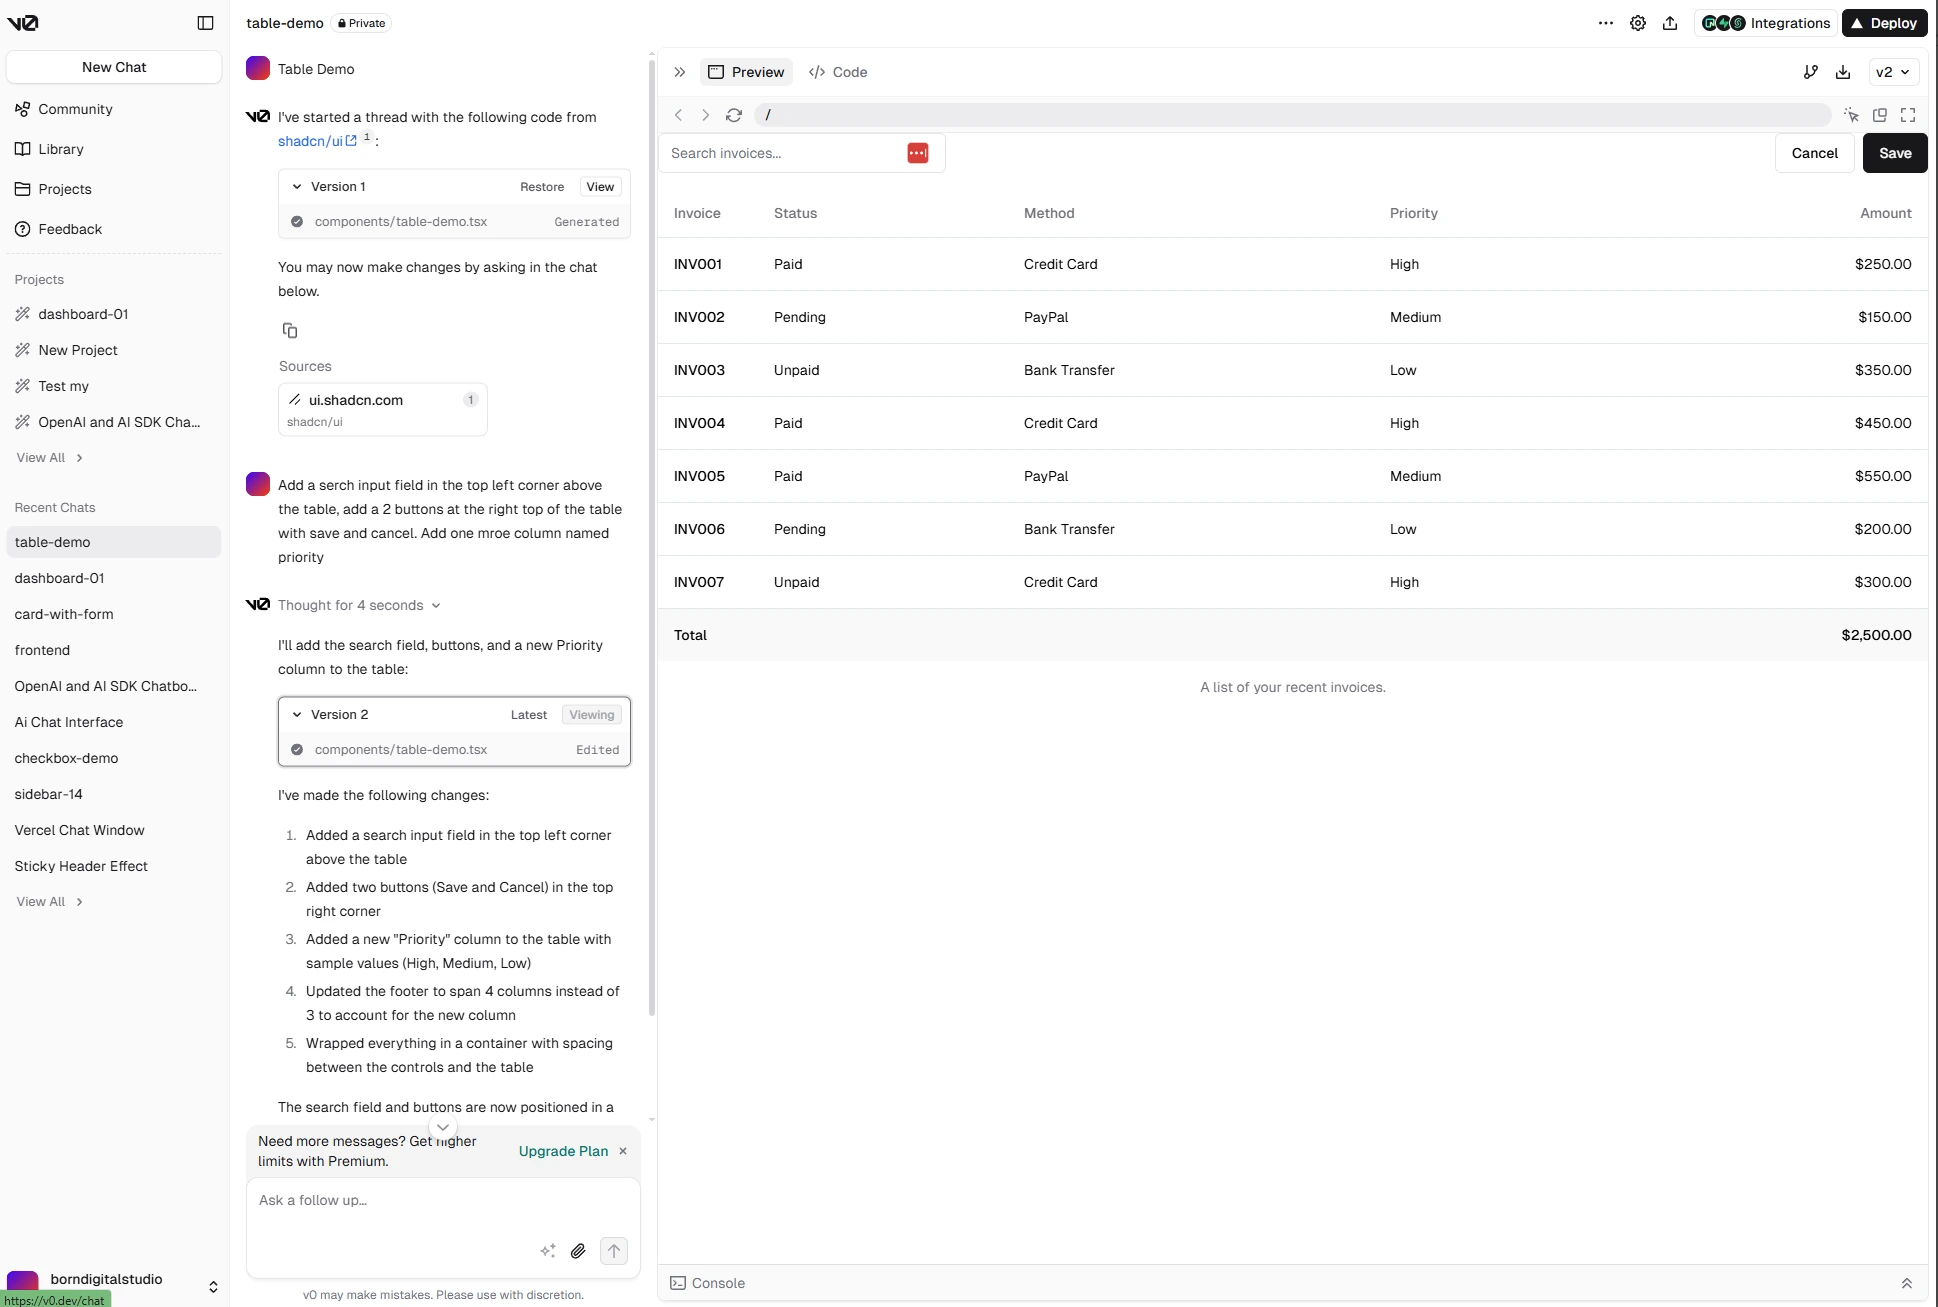
Add a search input field
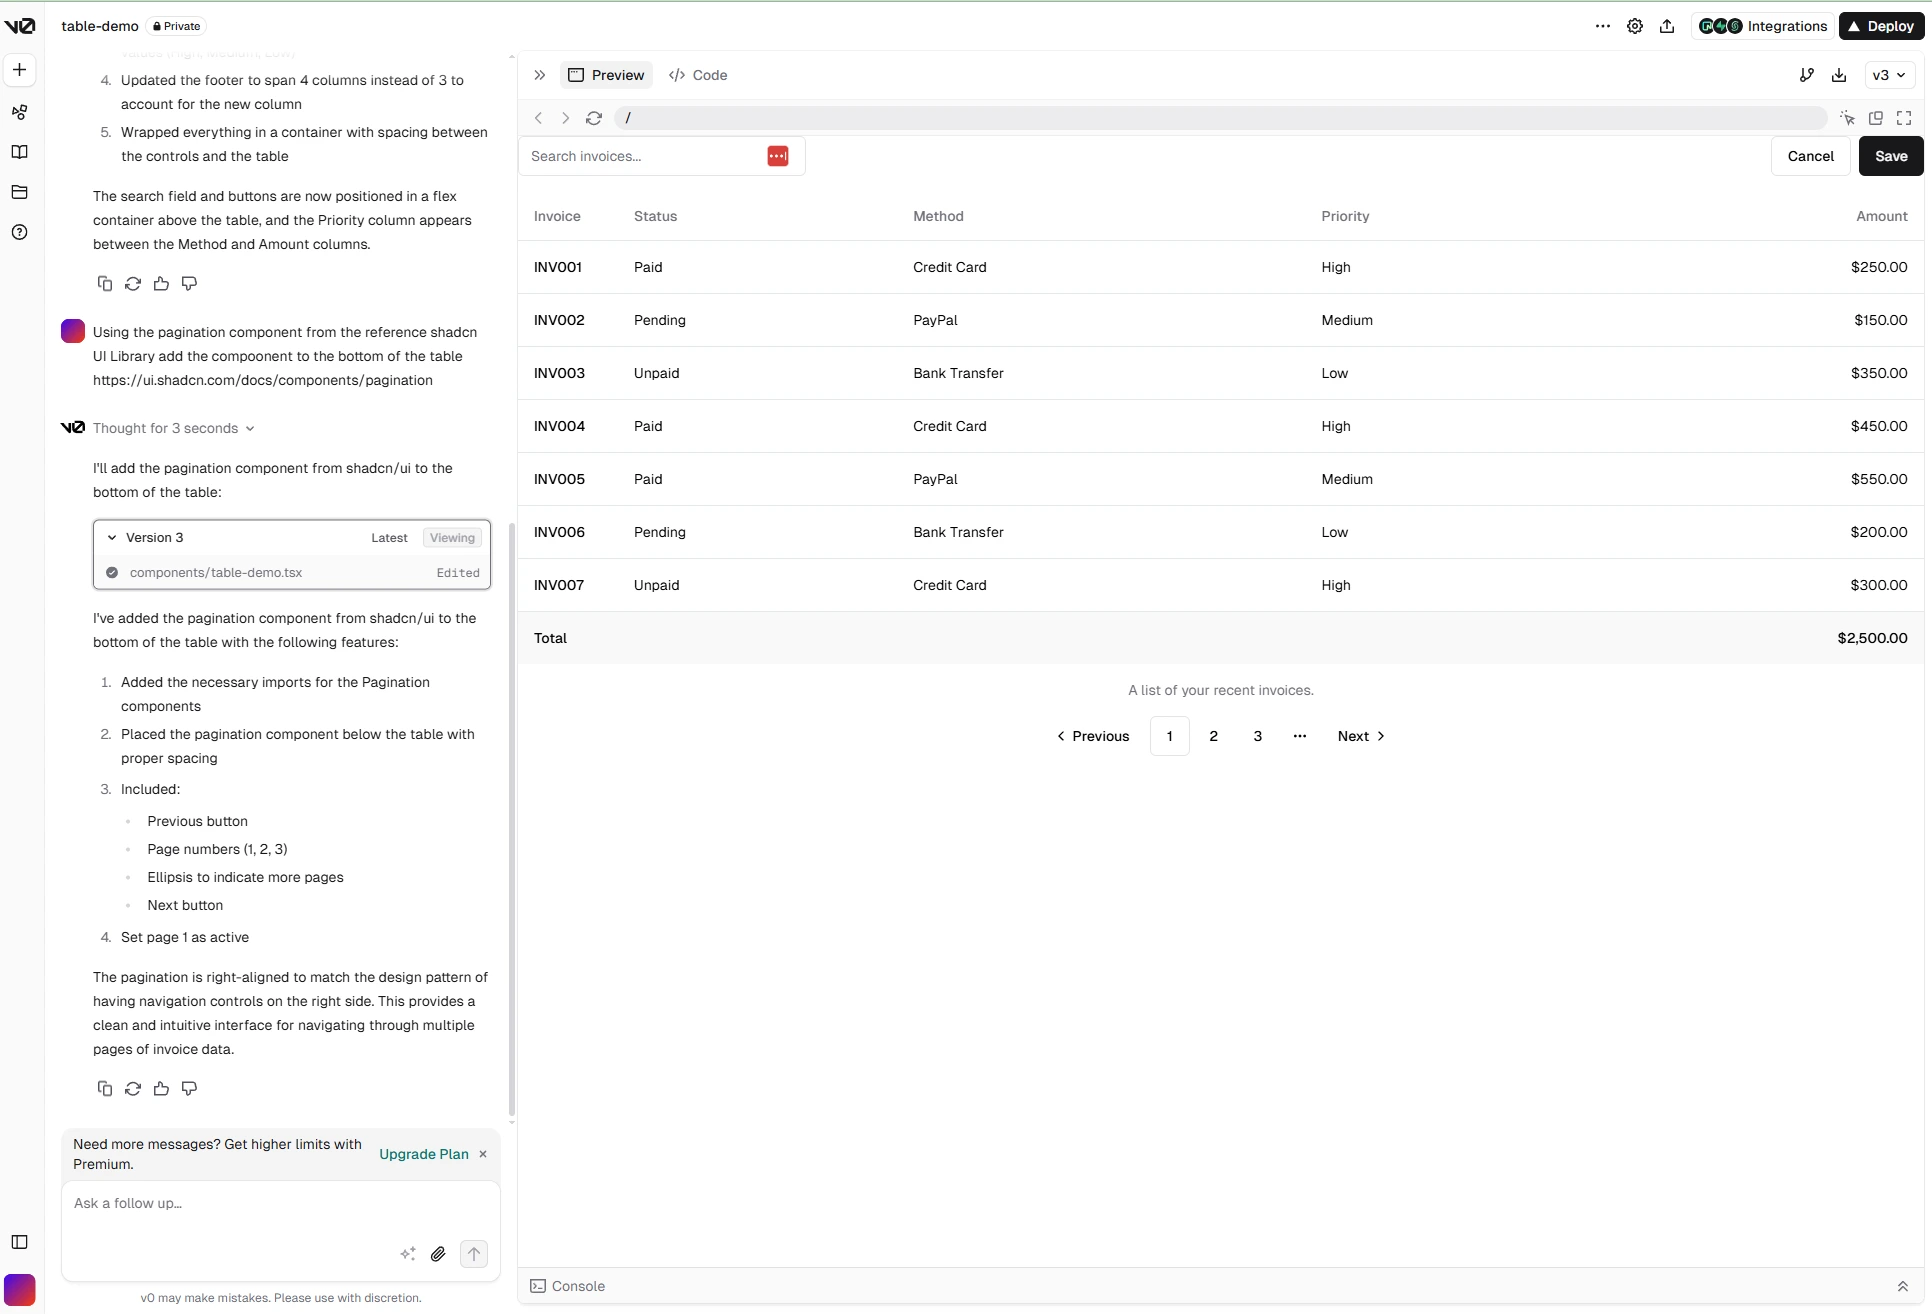
After opening, you can also customize the components with chat. We started with a component and configurated it based on our requirements, giving the following instructions to V0: ''Add a search input field in the top left corner above the table, add 2 buttons at the right top of the table with save and cancel. Add one more column named priority.''
Here is the result:
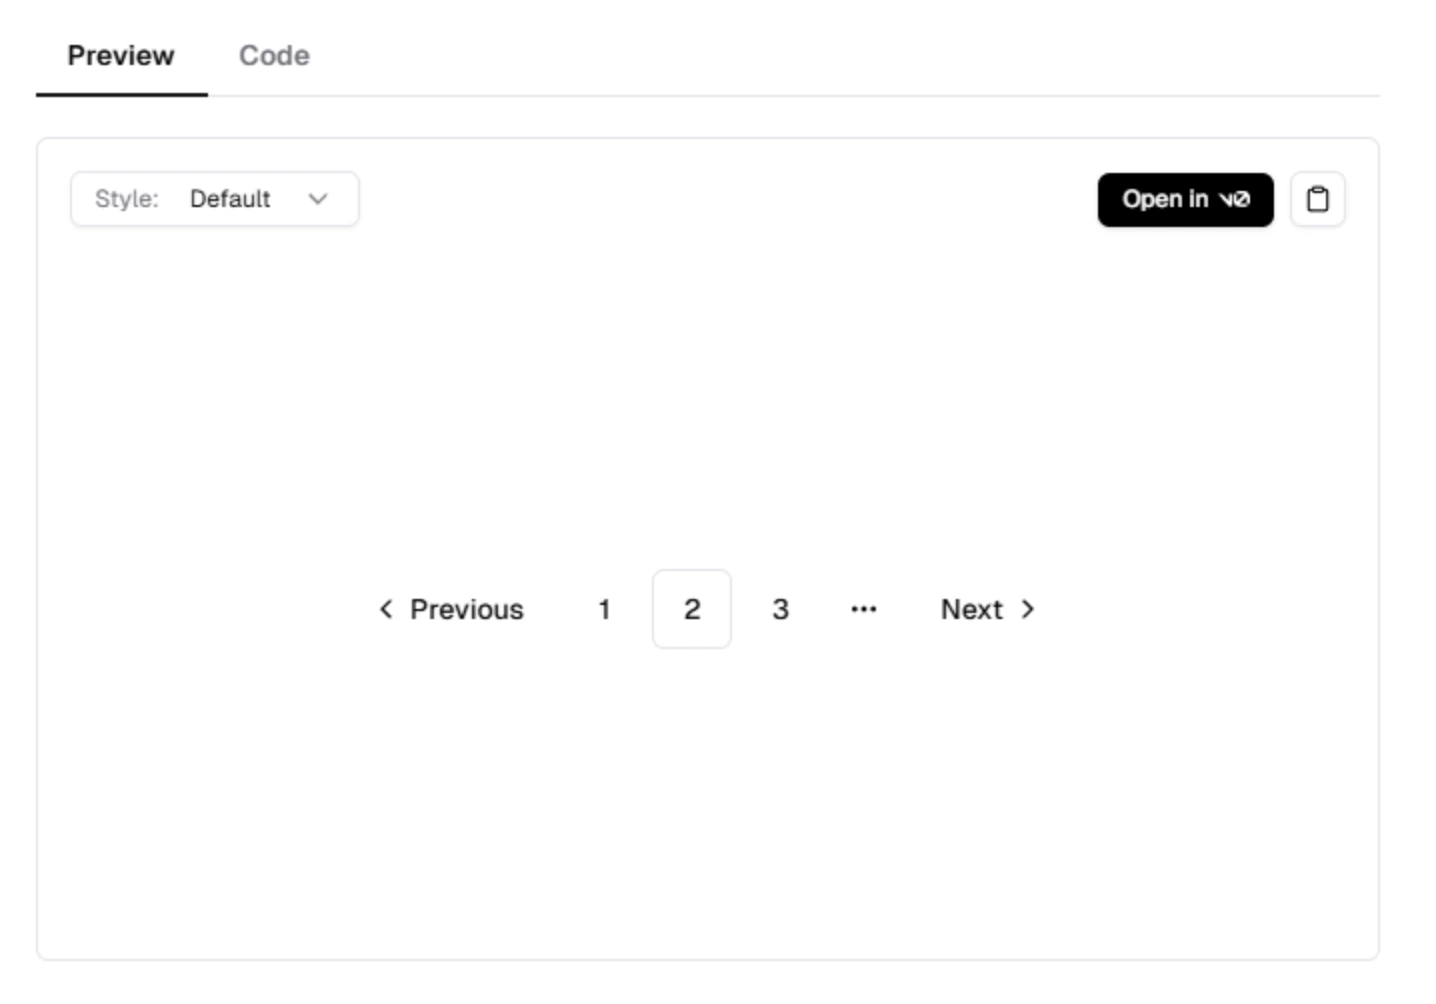
Add pagination component
We copied the URL of the component and instructed V0 to add page numbers: ''Using the pagination component from the shadcn UI library, add it to the bottom of the table.''
Reference: shadcn/ui – Pagination
Here is the result:
- Add the components to the codebase
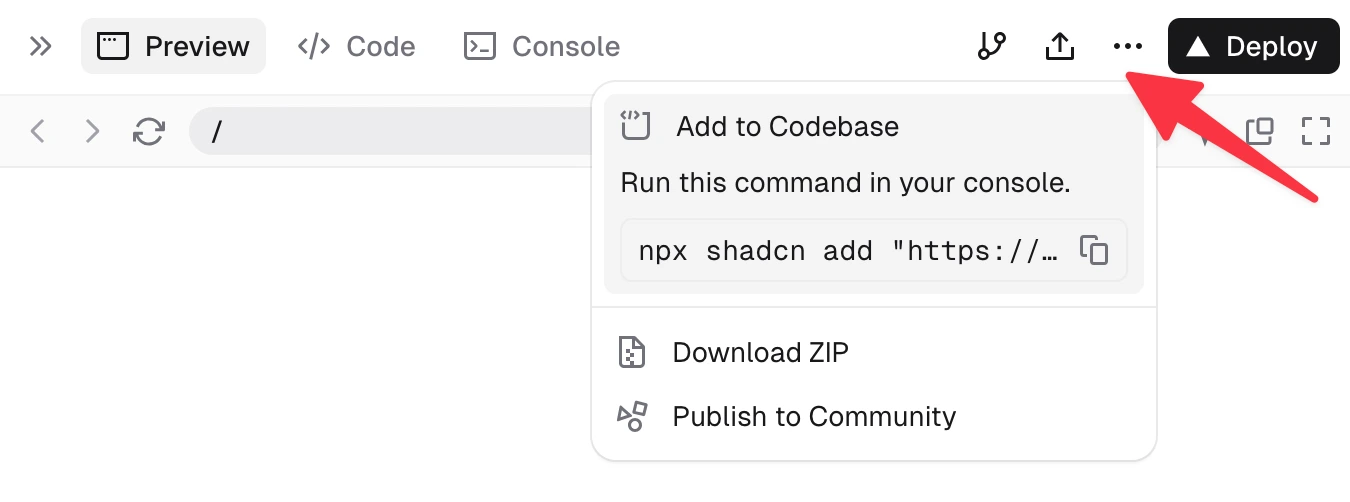
Once you’re satisfied with your components, you can ask V0 to 'Add to the Codebase' so that you can use them in your project.
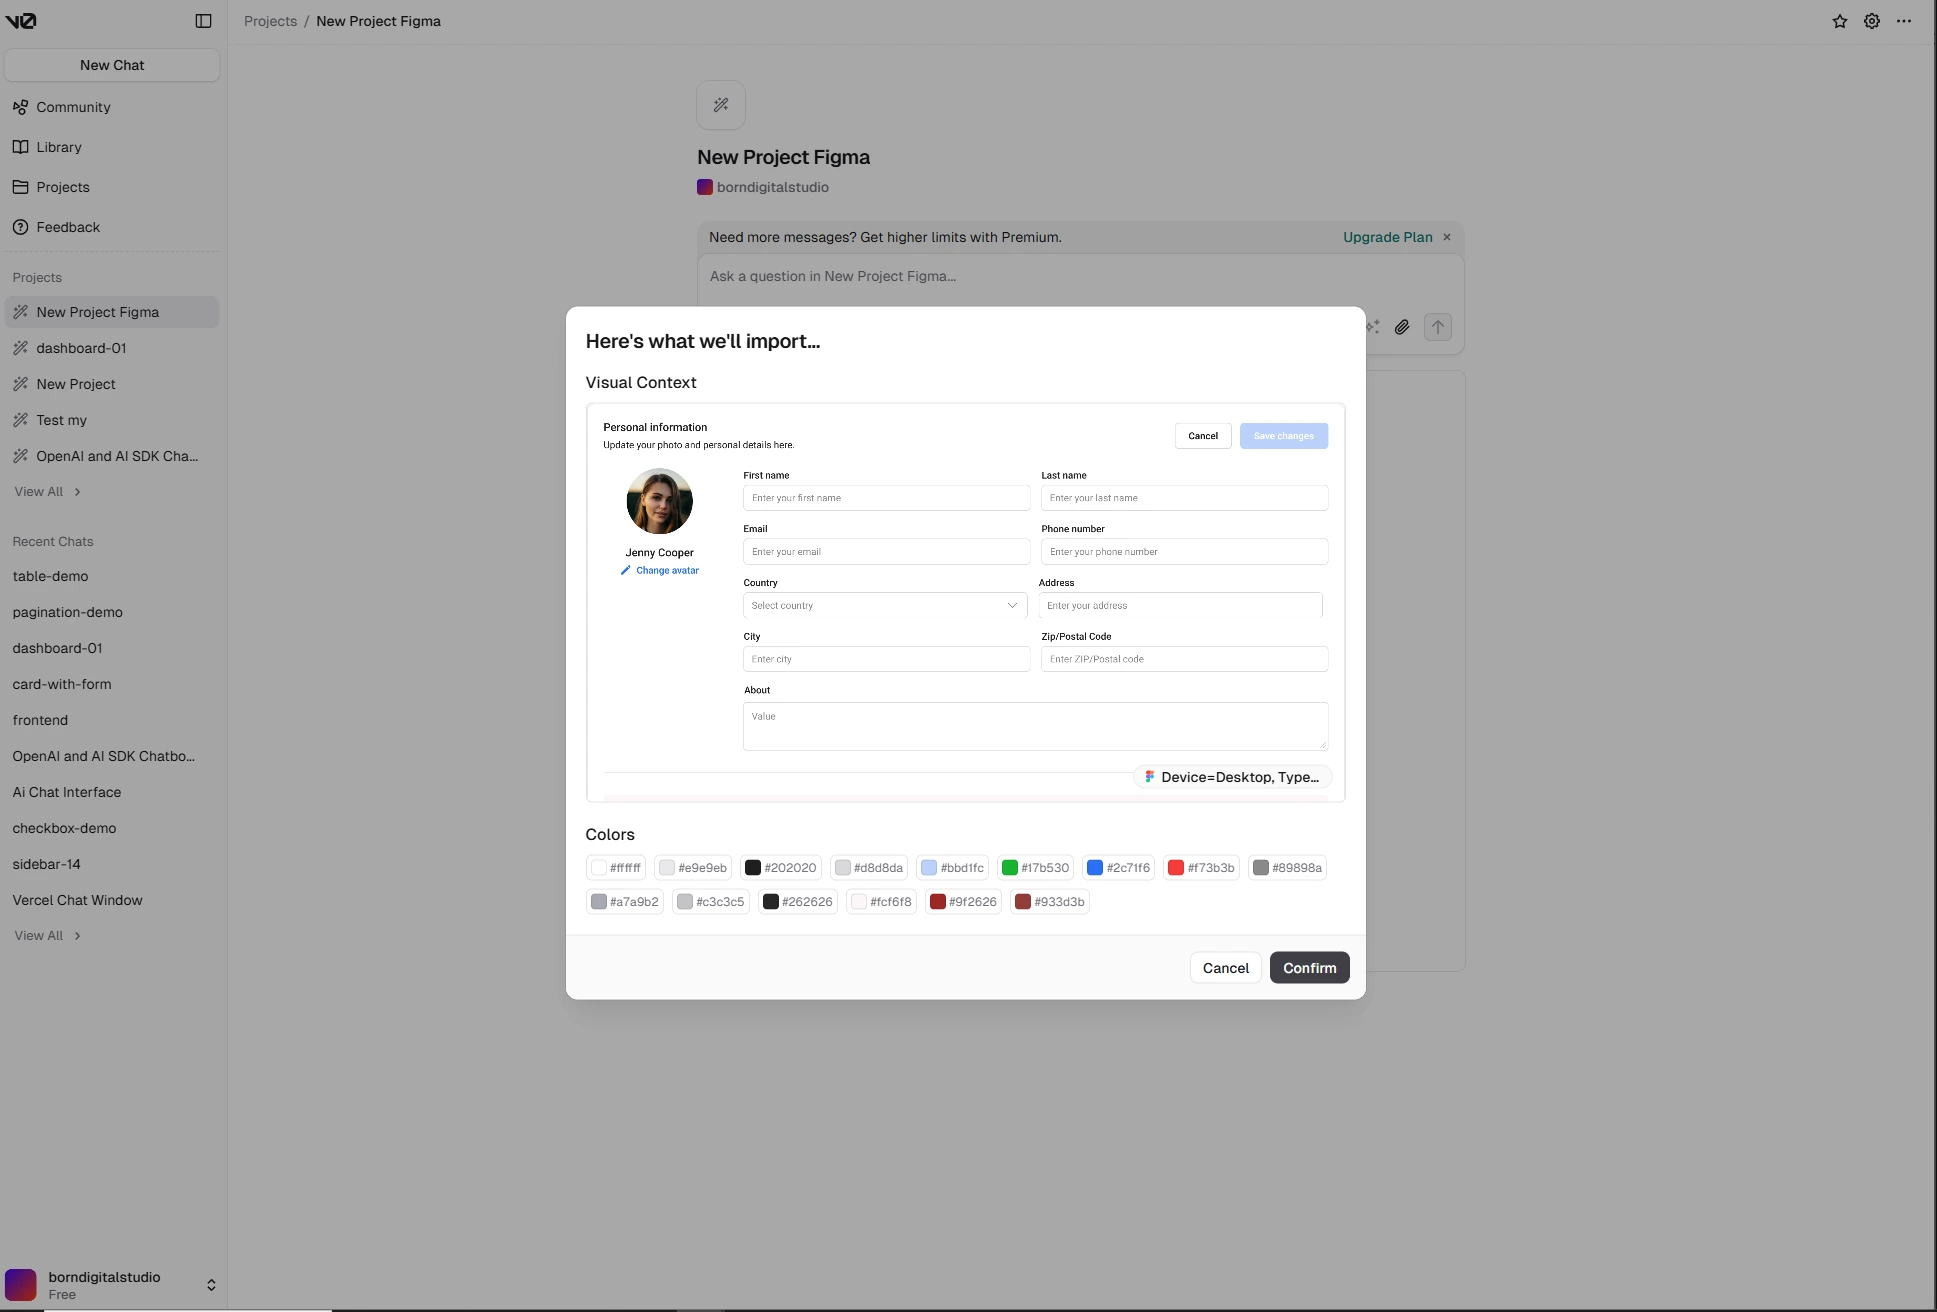
7. Integrate with Figma
Figma integration is a recent addition to V0, and it’s a game-changer for those working from existing Figma designs. By breaking your Figma design into smaller components and providing V0 with specific frames, you can ensure that your generated UI closely mirrors your original design. This makes the transition from design to development smoother and helps ensure consistency across your project. It’s a great way to bring your static designs to life in a more dynamic way.
Here is our process:
- Start a new project
- Choose a component
You go to Figma to choose the component that you need to build. Copy the link to the selection:

- Enter Figma URL
Paste the copied URL here to turn your designs into code:
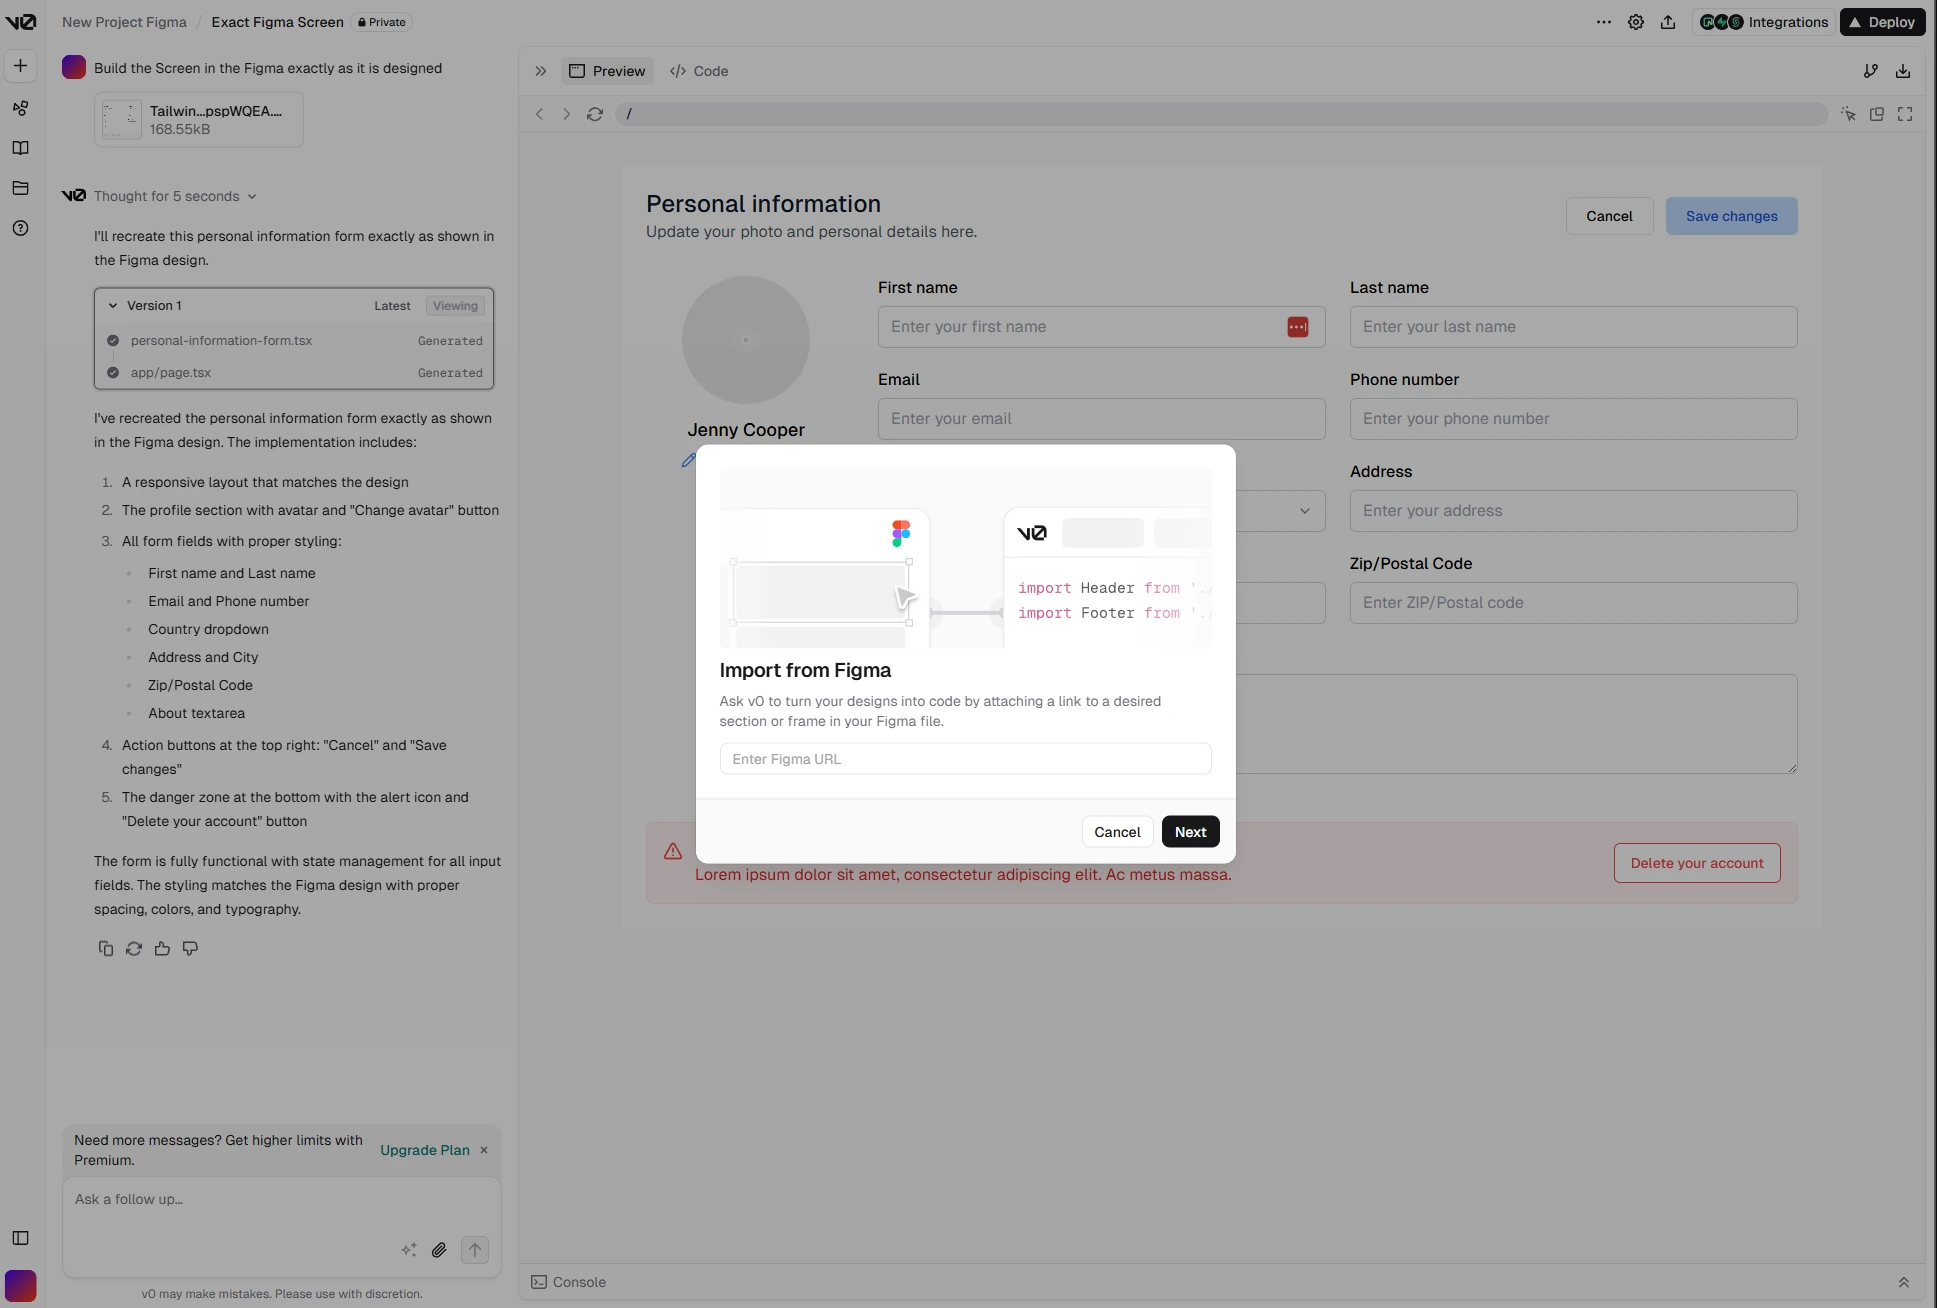
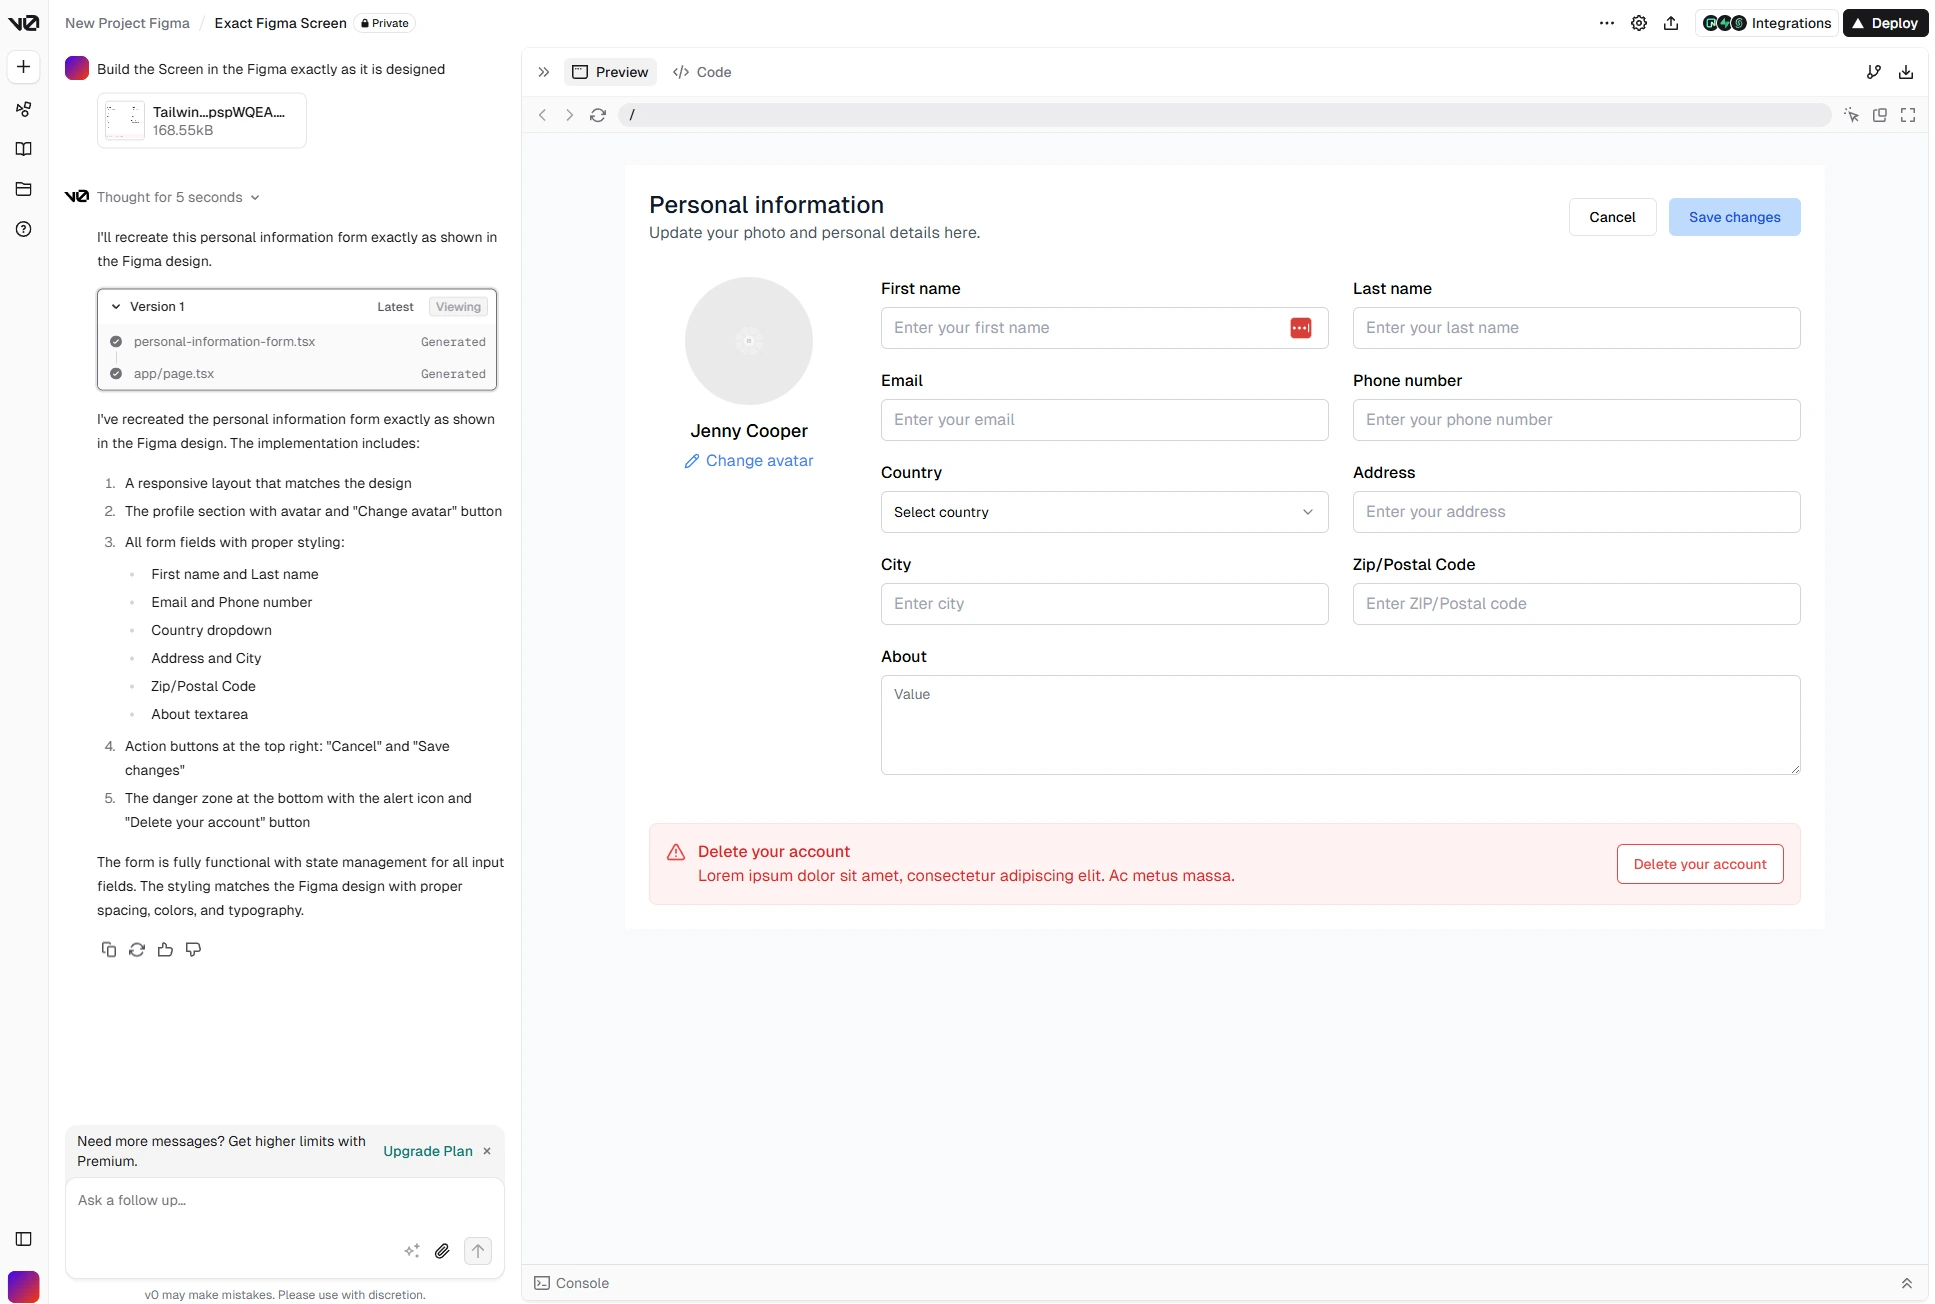
- Build the screen in Figma exactly as it is designed
Here is the prompt we used:
Want a richer and more comprehensive design system?
Check out our Design System based on Tailwind CSS - one of the most comprehensive Figma UI Kits out there - with 50% OFF your Team License!
For more information, click here.
8. Fork a chat
Sometimes, you may want to experiment with different UI concepts without impacting your main project. V0’s “Fork a chat” feature allows you to create a new branch of your chat history, letting you explore alternative design ideas or variations of components without disrupting your current work. This feature is ideal for experimenting with multiple versions of the same design.
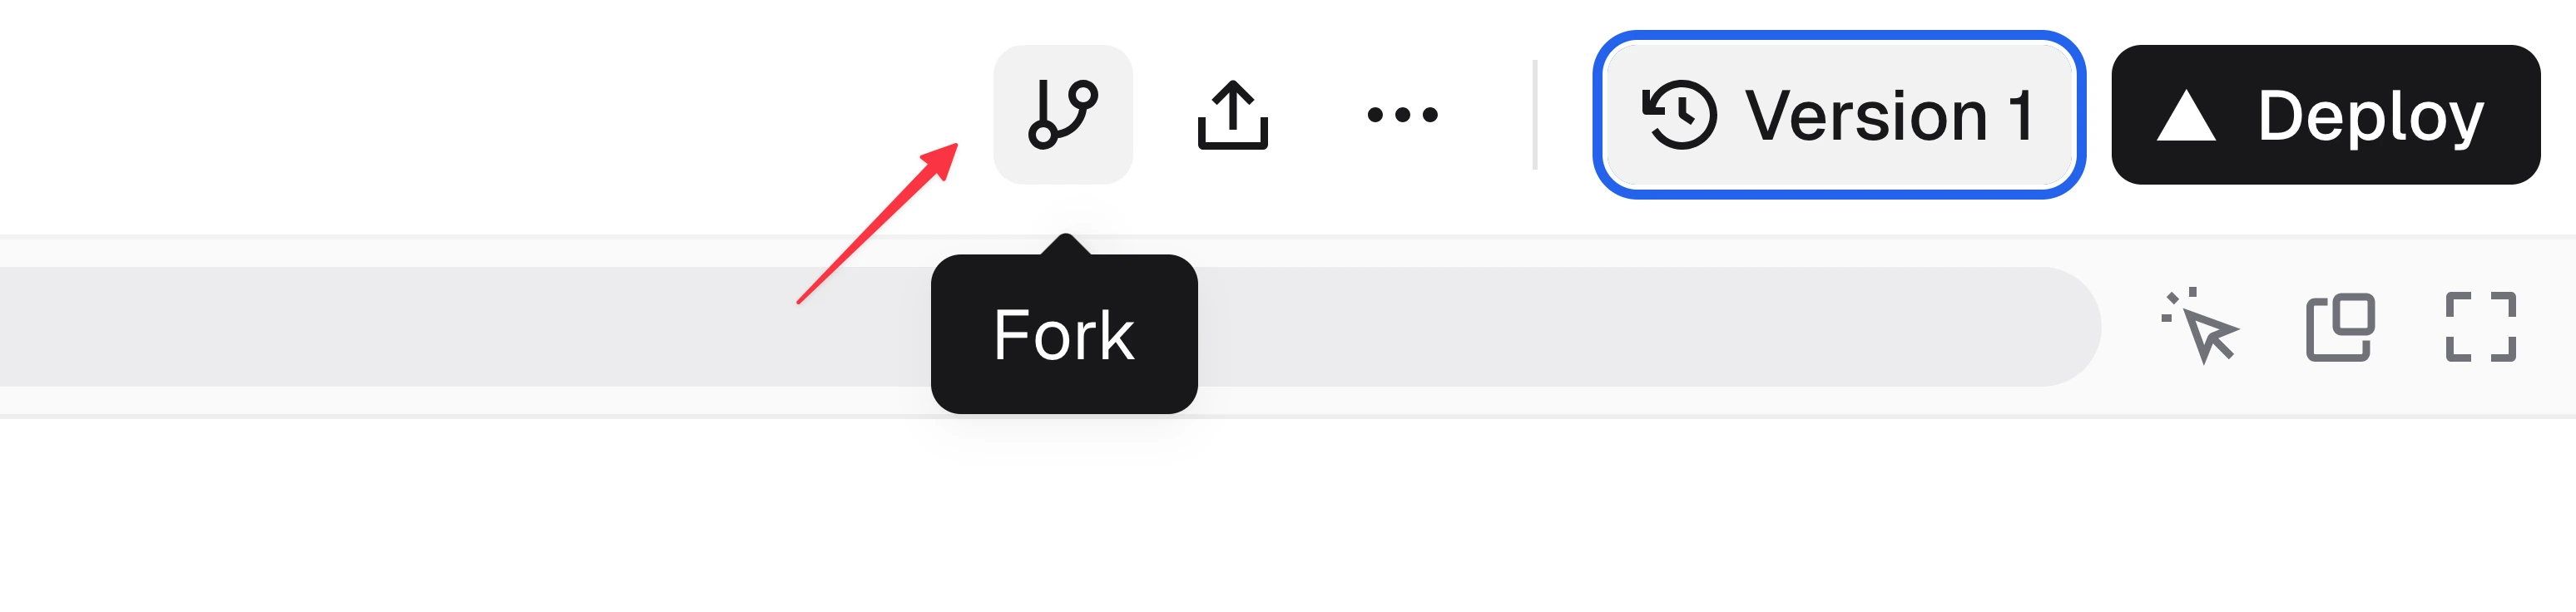
Essentially, forking a chat is like making a copy of the existing code and starting a new branch. This is particularly useful when you want to preserve the base version while trying out new ideas. You can also fork a chat based on someone else’s work. For example, V0’s homepage showcases a variety of projects shared by other users.
If you find one you like, you can click on it to open it in V0 and fork it. You’ll even see how many times the project has been “forked,” with higher numbers indicating its popularity.
Takeaways
V0 by Vercel is transforming UI prototyping, making it faster, more efficient, and highly accessible for developers and designers alike. The AI-powered approach eliminates the need for repetitive coding, letting teams focus on creativity and functionality. Whether you’re working on an MVP, iterating on a design, or building a scalable application, V0 provides the tools to create polished, functional prototypes in record time.
By integrating with Next.js, Tailwind CSS, and Radix UI, V0 ensures that you can build modern, responsive, and accessible web applications with ease. And with AI-driven enhancements, like real-time data fetching and API integrations, V0 is shaping the future of UI development.
Final thoughts
In an age where efficiency and speed are paramount, V0 is redefining the prototyping process. It merges AI-driven automation with developer-friendly customization, streamlining UI development for everyone. As frontend development continues to evolve, tools like V0 will continue to play a key role in bridging the gap between design and development, making high-quality UI creation faster and more intuitive than ever before.
Want to take your frontend development to the next level? Book a call with us today and let's discuss how we can help your team build cutting-edge UI solutions!
.png)
.png)
.png)
.svg)


